Showing posts with label Crafty-ness. Show all posts

Tuesday, September 18, 2012

small things {glue guns}


small things #71 ... glue guns

I love my glue gun.  My rusty, trusty, trigger-happy, turquoise glue gun.

This morning I blew away a pile of odds and ends in need of some fixing ...

Lydia's poor, dismembered pencil-topper monkey - Ka-pow!

Norah's cutie-patootie magnet face - Poom!

Ashley's dusty foam frame (complete with cobwebs!) - Blam!

Three out of the four wings on my decrepit dragonfly napkin ring - 
Rat-a-tat-tat-tat!

The unintentional floppy parts of Aaron's wannabe Teva sandals - 
Pow! and Phuwp!

Ma and her glue gun ... the Fixin'est Gun in the West!

Glue guns ... my crafty way of keeping my house together.  
One splootch at a time.

Thursday, March 22, 2012

Snapshots of Spring Break ~ More Color!

As I wrote on Monday, we planned a number of crafts last week.  The kids enjoyed getting paint on their projects and themselves.  The kids delighted in designing their handprints.  And the kids astonished themselves with their abilities to turn a lump of clay into ladybugs, snails and daggers.

But Mommy had a crafty week, too!  I also enjoyed painting and squishing around clay ... and tackling a project that I had pinned on Pinterest several weeks ago.

I was on the look out for something fun and Springy for our front door and found this.  Now ... I don't read Japanese, but I am a visual learner.  And I'm also a good faker.  With a few peeks at this project, I headed to Hobby Lobby and improvised.

In place of the green foam wreath, I chose a straw wreath that was wrapped in plastic.  I left the plastic on to keep it from self-destructing and in the process saved about $5 on the price of the wreath.  Awesome!

I didn't know how much eye-lash yarn I would need, so I bought two.  It only took one.  So now I get to take one back and put $7 back in my pocket.  Yahoo!

In place of the flower ribbon, I picked up a small bouquet of silk flowers in a variety of colors (because I really like color).  I also had a handful of random buttons laying around so I decided to use those for the center of flowers.  I used some floral wire that I had in my craft stash and by running a piece of wire up through the flower, through the button and back down, I had a nice little stick to press into the straw wreath.  That allowed the flowers to stand up and away from the "green grass", too.

I chose the purple wired ribbon to add a little more color and tied a big bow for the top while still leaving plenty for the loop at the top.

Finally, I printed my little words, "bare feet welcome..." off computer.  Before attaching them to floral wire, I "aged" the paper by crumbling it up a bit and running over the paper with a flesh-toned colored pencil.  When I had it appealingly crinkled and colored, I poked the supporting wires into the wreath and then tweaked it until I like it.

Ta-dah!


Inspired by Pinterest ... hodge-podged by me!
A little Spring Bling for my front door!


__________________________________________
Prompt #4 ~ Pinterest Challenge ...

Mama’s Losin’ It

Monday, March 19, 2012

Snapshots of Spring Break ~ Creativity

Today is our last day of our Spring Break Stay-cation.  Bummer and Whew ... all in one breath!  It was fun and it was filled.  A most definitely fun-filled week with my kids.  Here's the first installment in this week's series Snapshots of Spring Break.

On Monday of last week, we headed to Hobby Lobby with a cash in my pocket and a list of crafty thoughts.  And spent all the money and made it all!

Before the paint started flying!  Look how clean they are. 

Ashley had several craft projects that she had received on her birthday so she was busy painting her music box and designing her little bling-covered butterflies.  She was so happy glitter glueing and sequining everything in reach.

I had a jewelry box with the dancing ballerina, too!

We painted wooden napkin rings that were personalized for each family member.  We even did a few extras for guests.  That way when you come to visit you don't have to worry about getting one of the nasty cloth napkins from the kids ... the one sealed shut with syrup.

Meticulous stripes.

Look at the smile on that happy crafter!

Aaron even worked on a paint by number - for a few numbers.

We make little clay figures.  And plenty of large clay figures.  After several hours of forming ladybugs, hearts and daggers, we peeled the plastic table cloth off the table and kitchen benches and tossed all the clay crumbs and dusty bits in the trash!  More about those little creations in a later post.

My favorite project was making cement stepping stones with the kids' handprints in each one.  They each added their own unique touches ... and trinkets.

Aaron's ginormous hand ... and an itty-bitty Lego guy.

Norah's handprint with one of her
gymnastic medals nestled inside.

How old is Ashley?  I think she's six. And she added the most bling to her stone.

Lydia's handprint turned out great ... her picture?
 Well ... let's just say that this was the best one.

During this intensely artistic day I confess I had moments of, "Don't touch anything!" and, "Hands up until I get you a paper towel!" and, "Nobody move!"  Please take note of the exclamation points ... they were used appropriately.  At one particular moment during our painting time, Aaron was headed to the sink with a thoroughly coated paint brush.  As he walked along, he kind of twirled the brush like baton.

"Hey, Buddy.  Be careful with that brush.  You don't want to drip paint."

"Okay, Mom."

Sitting at the table, I spotted him out of the corner of my eye rinsing his brush.  And flicking the brush up and down with paint flying up, down and all around.

"Hey, Buddy!  Watch it!"

"What?"

He looked at me with obvious frustration on his face.

"Don't flick it, just let is sit under the running water."

"O-kay-ay."

"Hey." Deep breath, "I just don't want you to have to clean up a mess around the sink."

He then proceeded to walk to the refrigerator and wipe his still-paint-covered paint brush on my green checkered towel.

"Aaaahhhh!  Don't!"

"Uggghhh!  What am I supposed to do?!"

I stared at him in disbelief for just moment before launching into a bit of a mommy-tirade ...

"What do you mean, 'What am I supposed to do?'?! Use. Your. Paper. Towel."

Shining Mommy Moment ... twinkle, twinkle!

He shuffled back to his seat and I felt bad.  There is nothing quite as terrific as getting reamed while you're supposed to be having fun!

Looking back on this moment I am reminded with a grateful heart that this isn't how God operates.  He doesn't zing us when we mess up.  And He doesn't expect us to already know how to do everything.  He gave us His Bible for the purpose of giving us the necessary instructions and directions in life and then He gave us His Son for when we blow it anyways.

16 All Scripture is God-breathed and is useful 
for teaching, rebuking, correcting and 
training in righteousness, 17 so that the 
servant of God may be thoroughly 
equipped for every good work. 
(2 Timothy 3:16-17)

This is the same way I want to train up my kids ... with clear instructions and a lot of grace.

This 45 second interaction was a vivid reminder for me that my kids still have a lot to learn and I still have a lot of years to instruct, remind, forgive and re-direct.  And instruct, remind, forgive and re-direct.  And ... instruct, remind, forgive and re-direct.  That is the patient and persevering job of a parent.

And I'm in it for the long-haul.  With God's help.

4 Fathers [and Mothers], do not exasperate 
your children; instead, bring them up in the 
training and instruction of the Lord.  
(Ephesians 6:4, addition mine)

Thursday, July 28, 2011

Dry Watercoloring!

My name is Morgan and I don't like Play-Doh.

Whew!  That feels good to get off my chest ... but I think there are a few more confessions to make:

I don't like glitter.

I don't like beads.

I don't like stamping.

I don't like watercolors.

Uhmmm ... hmmm ... I think I need to go back and rephrase those statements.

I don't like when my kids play with Play-Doh ... 
and the clean-up involves twice as much time as the actual "fun" had by the kids.

I don't like when my kids use glitter ... 
and I find my floor still sparkles nine months later.

I don't like when my kids are beading ... 
and all I can hear the tippity-tappity-tip-tip-tips of the itty-bitty seed beads dancing around the table only to roll to the floor to join the glitter.

I don't like the clean up involved after my kids have been stamping ... 
and I find myself wiping not-so-washable ink off the table, chairs, the kitchen floor and more than one knee.

And as for watercolor ~ I don't like when my kids watercolor because of the sheer amount of water that goes into their drippy, soggy, colorless paintings.  They definitely have the water-part of watercoloring down, in fact, they use so much water that they "paint" right through their paper to the table below.  We also find that their sodden works of art have to be ironed flat after drying due to their sheer saturation.  And due to the ginormous amount of water used, there is no discernible color ... just a lot of dishwater grey.  (And don't get me started on the periodic floods that cover the table when some little person's elbow collides with the rinse cup ... effectively turning my MOPS notepad a lovely shade of dishwater grey.)

Until ...

We discovered Crayola No-Drip Watercolors ... and suddenly I'm saying, 

"Yes!  You should watercolor!"  

This little number is terribly cool.  It comes with two brushes/markers and a tray that includes six colors, each in their own little contained capsule.  There is also a "cleaning pad" that you can use to wipe the brush clean.  This eliminates the pesky need for an opened jar of ready-to-be-spilled water which makes me happy. (see above)

Your little artist sticks the brush into the small opening of the desired color, the tip absorbs a small amount of vibrant color and then your little one uses that mess-free tip to color to their heart's content.  Want a new color?  No problem!  Simply wipe the brush clean on the pad and choose a new hue.  When the pad gets dirty, which it does, just rinse it off under running water (the same with the brush tips) and then you are ready for the next masterpiece.

There is no spilling, no soggines, no tearing sodden paper ... and your kids can discover the COLOR aspect of watercoloring!

Ashley is hard at work painting her yellow daisy yellow.

Even Lydia enjoys getting her artistic-groove on.

I don't think the gloves are necessary
... the paints are non-toxic.

A garden masterpiece ...
straight out of Alice in Wonderland.

Proof that even the littlest hands can manage this craft.
I have found that my girls are happy to sit and "paint" for long stretches of time ... much longer than the actual amount of time needed to clean-up!  And that makes Mommy happy, too.

Now ... my mom might disagree about this craftiness falling under the heading of watercolor.  But that's only because she can do things like this with her watercolors and brush:


Yes!  She's amazing!  Maybe someday one of my little people will create such wonderful pieces, but first we have to master the water-containment issues!

For more wonderful watercolors to enjoy, head over to my mom's website.  You won't regret it!

_________________________________

Linking up with Mama Kat today ...
Prompt #4 ~ something that keeps your kids busy for 20 blissful minutes! :)

Monday, February 14, 2011

Happy Red & Pink Day!

This is the only day of the year where it appears to be okay to wear both red and pink simultaneously.  On the other 364 days of the year we say, "eek ... that makes my eyes go crazy!"  But today, we say, "How cute and festive!"

This is also the day when my kiddos come home from school completely and utterly sugared-up!  Almost as buzzed at Halloween ... but not quite.  I love that our teachers included in their letter home to parents the fact that they would also like to offer some non-sugar options:  meat, cheese and crackers; and veggies and dip.  I wish them the very best in getting the kids to choose carrots and ranch dip over cookies with frosting! :)

In addition to the sugar-coma in a bag that the kids enjoy in their classrooms, they also get the joy of exchanging heart-felt valentines.  This year, my kids stood for about 10 minutes in front of the wall of valentine cards and debated and hemmed & hawed and discussed and studied every box on the shelf.  Every.  Box.  At one point, Norah had Justin Bieber, Tinkerbell and Exotic Animals in her arms.  She decided upon the animals ... whew!  Aaron bounced back and forth between the Transformers box and the Spiderman Box ... and eventually walked away with a football themed set.  Ashley flitted from girly-girl box to sparkly box and finally chose the Tinkerbell box ... only to go running back as soon as we left the aisle for the Disney Princess set.  Such difficult choices!

This weekend, we had the job of designing the kid's boxes for the accumulation of similar valentines, packaged candies, tattoos, pencils and stickers that will be distributed this afternoon.  I remember vividly designing my Valentine's Day box in elementary school.  Cereal boxes covered in pink, red and white construction paper with paper, lace doilies, hearts and those little accordion folded paper arms that would sproing! out with little hearts glued on the ends!  With this fond memory tucked away in my mind, we started talking about what sort of box they kids wanted to do.  To my surprise ... they wanted to go a whole different route!

So ... I put away my red construction paper.  I stored my pink markers.  I didn't bother to buy doilies ... and pulled out the black satin fabric instead!

Here are my kids Valentine's Day boxes ... (drum roll, please .........)

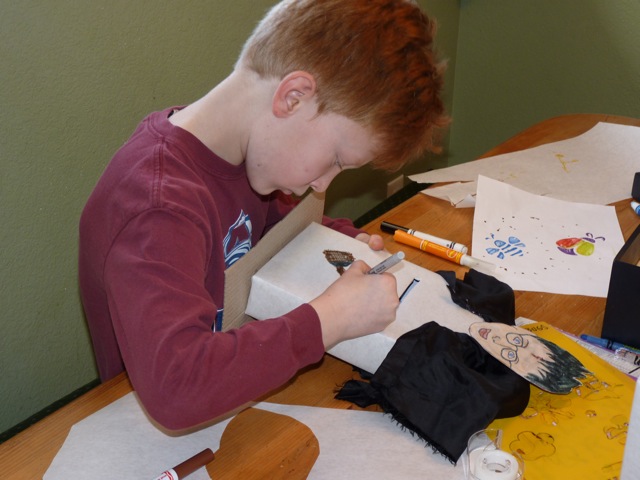
Harry Potter and his broomstick!

Puss-n-Boots and his "pretty please" eyes!

Who knew that Harry and Puss could be iconic Valentine's Day characters?!?

I know that you are already done with Valentine's day for this year ... but if you want to tuck the following tutorial away for next time around, you'll have all you need to make your very own!

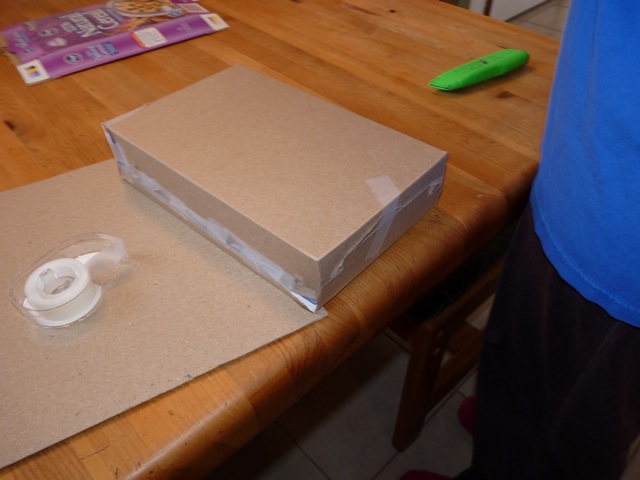
1.  I rustled through the recycling bin to salvage several cereal boxes and plugged in my glue gun.

Rescued for a second life as a .... box.

2.  I turned the box "inside-out" by sliding my finger along the glued seam.  I folded it back together with the print facing in.  This will save you from trying to cover "100% Natural Cereal" with your white paper.

Inside out ...

and rebuilt.

3.  I cut the opening in the side of the box with an exacto blade.  Norah wanted everyone to put their cards in the little paper sack, so her box is intact - purely the backdrop for the bag.

4.  I have a roll of newspaper print stashed in the pantry for just such projects.  I cut out pieces big enough to wrap around the boxes and then wrapped them just like a gift box.


4b.  From here, Ashley decorated her box with stencils of butterflies, bumblebees, her name and "D E F".  "D E F", you ask?  Well ... when you are using an alphabet stencil, those letters sit side by side and fit perfectly on your box!  Ha!

Proud Ashley and her butterfly box.

5.  I gently cut through the paper in the opening I had made previously and folded the little edges back against the slot in the box.  I used a little tape to affix the edges so that they won't rip (too badly) when kids put/cram their cards in.  For Aaron's box, I cut a little trap door in the back so that he can get his cards back out.  I cut a flap on three sides and then held it closed with a little piece of tape.  It is covered with the cape, so you don't even know that it's there.

6.  For the faces, I got on the internet and did a search for each character.  When I found the ones I wanted to use, I copied the image to a Pages document and then enlarged it to the right size.  Then I taped a piece of white paper to the computers screen and traced the outline of the face.  The kids then went back in (with a little help from mom) and blacked-in the outlines and colored the faces with markers and crayons.  Norah certainly had the most trouble with this because she had an image in her mind of what Puss-n-Boots should look like and he wasn't coming very close to what she imagined.  But ... more on that later this week. (That's a whole post on its own!)

Harry is coming to life.

Puss is getting some color.

7.  Once the faces were colored and cut out, I glued them to the end flap of a cereal box.  The face was glued to the front of the box with the chin hanging down just a bit over the lid.  When I cut out the face, I left the flap so that I had a long piece to glue to the top of the box and the face would be perpendicular.  Does that make sense?

8.  The cape material was left-over from when Aaron was a ninja for Halloween a few years ago.  I simply cut out a rectangle of the satiny fabric and hot glue gunned on the cape around the "neck" of the character.

8a.  At this point, Aaron/Harry was almost done.  Aaron added the drawing of the Firebolt broomstick while I worked on his wand.  We had a twig to which we glued a scrap of paper that had been colored to look like fire or sparks.  I then glued the "wand" to the side of the box under the cape.  I'm keeping my fingers crossed that this is still attached by the time the actual party rolls around tomorrow.


9.  Norah had one more important part of her box to add and that was Puss' sack.  I used a brown lunch sack and cut about 3 inches off the top.  I also cut about 18 inches of red ribbon and glued this to the back of the sack about 1 inch from the top.   I crinkled up the bag and then glued it flat to the front of the box, making sure that the ribbon was secure between the bag and box.  I tied a little bow around the bag, but kept it loose enough that cards can easily be dropped in and retrieved.  I hope.  Or so Norah assured me.

9a.  Meanwhile, Norah was drawing, coloring and cutting out his sword which slid very nicely into his paws that are clutching the top of his sack.  Ta-dah!

Puss and Norah ... please give me some candy!  :)

All in all, it was a fun project (minus the not-fun that I will share tomorrow) and the kids were thrilled with their boxes.  Mommy enjoyed it because it was crafty and creative with a little problem-solving thrown in for fun!  All in a morning's work!

Happy Valentine's Day!

Click to play this Smilebox slideshow
Create your own slideshow - Powered by Smilebox
Personalize a photo slideshow

Monday, December 27, 2010

What's Today?!?

Why, it's December 27!  Anyone know what's special about today?

Nope, it's not "Hum-Drum Monday after Christmas".  

It's not "Take the Random Christmas Kilt Kit back to Target" Day. 

It's not "Dump the Christmas Cookies Down the Garbage Disposal" Day. 

Or "Heft the Christmas Toy Packaging to the Curb" Day.

According to my calendar (that I made last year) ... 
it's "Cut Paper Snowflakes Day"!  Yeah!

This is especially important this year because it's the only snow we've seen. :(  I'm certain that I'll be grumbling about the snow come February ... but I'd still really like to see some now!

Anyhooo .... the kids and I had a lot of fun making some paper snowflakes last week for our Christmas dinner decorations:

Lydia kept busy with a little solo game of Battle Ship.
Norah makes her deliberate cuts.

Ashley's own interpretation of a snowflake. :)

Such fun!

We ended up with a wonderful variety of sizes, shapes and designs ... with a few, frosty blue ones thrown in for fun.

Such focus and attention to detail.

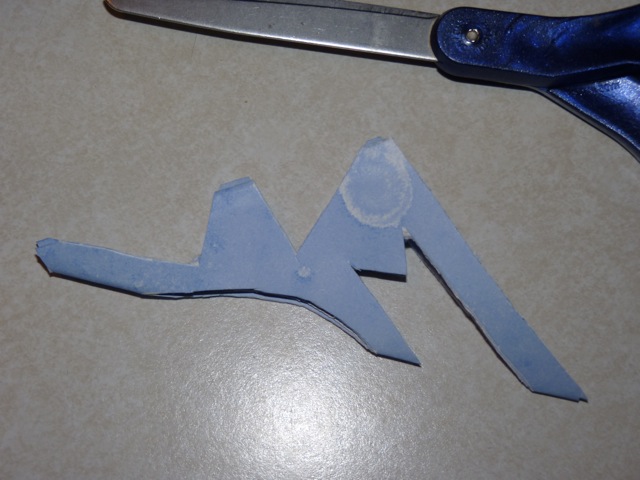
As it turned out, Aaron is our resident snowflake maker.  He was amazing ... and completely out of our league!  While we girls were making cautious little snips, triangles and curves, Aaron was boldly cutting huge zig-zags, arrows and hearts.  When we unfolded our creations, it was always a little more exciting to see what Aaron came up with ... intricate designs and stunning patterns.  I guess this was an example of where a little extra boldness results in truly astonishing beauty.  (It also resulted in several snowflakes snipped to smithereens ... but that's a risk he was willing to take!)  Two little lessons, I should take to heart! :)

Ooohh!  Aaahhhhh!

So that you can join us in "Cut Paper Snowflakes Day", here are some very simple directions that I got from Norah's teachers.  We made about a million of these little guys one morning at school with the 2nd graders ... so you can master this, too!  Just follow along and you can make it look like a blizzard has struck you house, as well!

1)  Get a square piece of paper.  You can use 8.5 x 11 paper and trim off one end to make a 8.5x8.5 inch square.  I rummaged around in my craft supplies and found some blue 12x12 inch scrapbook paper for a few bigger snowflakes and some pretty mulberry paper for a few delicate looking snowflakes.  Of course, you could use hot pink scrapbook paper ... and have either hot pink snowflakes (Norah would love that!) or just turn them over ... seeing as that side is white, and all. :)


2) Fold the paper in half.


3) Fold the paper in half, again.  You should have a small square.  Now unfold it, you will use the crease in the center as a guide.


4)  At this point, make sure that the opening of the folded paper is facing away from you.  Otherwise, things get funky!

Fold the right side of the paper in towards the center crease.  You will now have a crease at the half point and a crease at the one-quarter point.  Open it up again.


5)  This is where it gets just a tad bit tricky.  Take the left corner closest to you and fold it so that it touches the one-quarter point crease.  You will have a tail sticking up above the top line of the paper.

Yes ... I'm wearing a pop-bead bracelet that Ashley made me.
6)  Now take the right corner that is closest to you and fold it across the paper to make a triangular tip.


You will have something that looks like this:


7)  Take this funky triangle and fold it in half.  Now you have the paper folded to make a 6 pointed snowflake.


8)  To have points on your snowflake, you want to cut the bottom at an angle.  For a round snowflake, simple cut straight across.


9)  Here is an example of my cuts.  If you want Aaron's more dazzling snowflakes, think:  Bigger and Bolder!


And here's the finished product!  So pretty!


To flatten out your beautiful creations, slide each snowflake between to pieces of paper and iron them on low.  Of course, my kids (as always) were surprised that we owned an iron.  Yes ... I just don't use it very ofter.  If ever.

Here are a few of our other favorites ... for your inspiration and viewing pleasure:

Even Ashley ended up with some lovely snowflakes by simply folding the paper into fourths and snipping, snipping, snipping.


Norah was recovering from a slumber-party hang-over, but she still managed to cut and create some beautiful and unique snowflakes.


Here are a few of my favorites.  Even with my cautious approach, they turned out lovely.


Finally, here are Aaron's favorites.  He certainly has a creativity that is lacking a bit in his mother's. :)  He was like Michaelangelo ... freeing the snowflake from the computer paper! :)


So ... what are you waiting for?!?  Grab some paper and scissors and get cutting ... create a blizzard!