When we were expecting little Aaron, we started a fun, family tradition. And now, eight years later, we're still enjoying it! It's simple. It's sweet. And, it involves sleeping. :) I had visited a craft fair the Christmas before Aaron was born and stopped by a booth that was selling pillowcases. Not just your average pillowcase, but holiday pillowcases. There were so many delightful holiday fabrics: snowmen, holly leaves, Christmas trees, and angels. After much browsing, I chose a pillowcase with a navy blue background and a variety of snowmen dancing across it. I bought it with the intent of using it on Aaron's bed ... whenever he got old enough to use a pillow ... like in two years. I'm a planner, alright!
The tradition of the holiday pillowcase is that on Thanksgiving night, we switch out our regular, old, boring pillowcases for our special, Christmas, wintery pillowcases. And in Brett and my case, flannelly warm, too! For the month leading up to Christmas, we snuggle into our beds, resting our heads on our Christmasy pillowcases ... while visions of sugar plums dance in our heads!
It is such fun to see the kids' excitement as well when they head to bed only to discover their special pillow fluffed and ready for ushering them off to dream land. A few Christmases ago I made pillowcases for our entire family (cousins and grandparents alike) and it is fun knowing that they just might be sleeping on their holiday pillows, too!
I want to share with you the super-duper easy pattern for making your own holiday pillowcases. I use the word, "pattern" lightly as it's a bit of a "make it up as you go along" pattern. :) But ... if you can sew a straight line, you can make this. And even if you can't ... remember you will be filling the fabric with a lumpy pillow, so it doesn't really matter if it's straight or not! :)
First, head off to your nearest fabric store. There are hundreds of fabrics to choose from: cutesy, elegant, traditional and contemporary. I chose two girly fabrics for Lydia and our niece. They are pink and precious ... just like our girls! I also chose a flannel fabric so that it would be soft.
 |
| "In Winter there is snow and the snowman can play." |
Once you have made your fabric choice, you will want to have one yard per pillow. I ask the fabric store employee to cut the fabric in one yard increments if I'm using the same fabric for each pillow. That will save me work later. Of course, I highly recommend choosing a different fabric for each family member ... that makes them even more special and personal!
Next, get your sewing machine up and running. You will want some space to lay out the fabric and you will also want some straight pins. Put your scissors aside. You won't need them. I told you it was easy!
Now, this is important. Go get a pillowcase. You need this for two reasons: 1) So you can see what one looks like and how simple they are put together, 2) So you can make sure what you sew will fit around a pillow.
Now for the pinning. When you got the fabric, it measure 45" across, but it is folded in half. You want to unfold the fabric and lay it on the table with the wrong side facing you and the crease running up and down in front of you. Take the edge closest to you and fold it up about 4 inches. Then turn that edge under and pin it. You should have a 3 inch seam with the rough edge tucked up inside. See the picture below:
 |
| The hem for the open end ... about 3 inches deep. |
Once that is pinned all along the top, sew a straight stitch from one end to another, making sure to catch the tucked edge. This will be the opening of the pillowcase.
Next, you will sew the pillowcase closed. Fold the pillowcase in half again, but with the wrong side facing out. Match up the edges of the fabric, making sure the corners meet. Pin the fabric together along the long and short side to keep the pillowcase together.
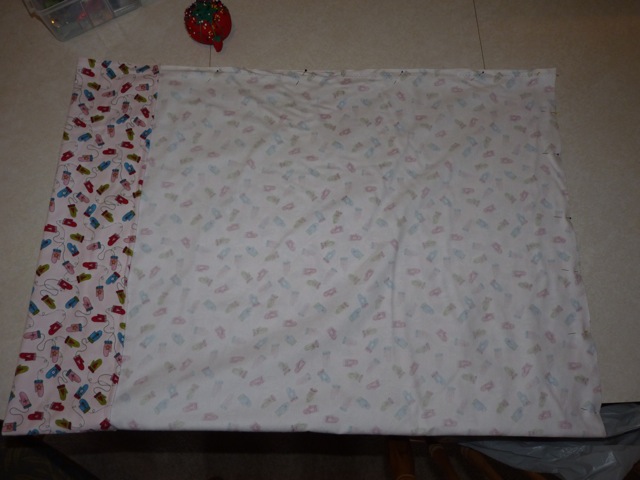 |
| The fabric is folded in half ... ready to pin. |
 |
| This side is stitched with about a 1" hem. |
Now it's time to sew a straight stitch from the opening end down the long side. When you get about 1" from the bottom, make a 90 degree turn and sew the bottom/short side. Turn the pillowcase right side out and ... ta-dah!
 |
| Fluffed and ready for snuggling! |
It took me about 15 minutes to do one pillowcase. That's it. It took longer for me to drag the machine upstairs and clean up the 30 or so teeny-tiny beads that Lydia dumped all over the table!
I hope this inspires you to start another delightful holiday tradition ... and may all your dreams be Christmasy bright!!
No comments:
Post a Comment
Thanks for visiting! Your comments are warm fuzzies! (And con-crit is always welcome, too.)